
Appearance
Printing Maps
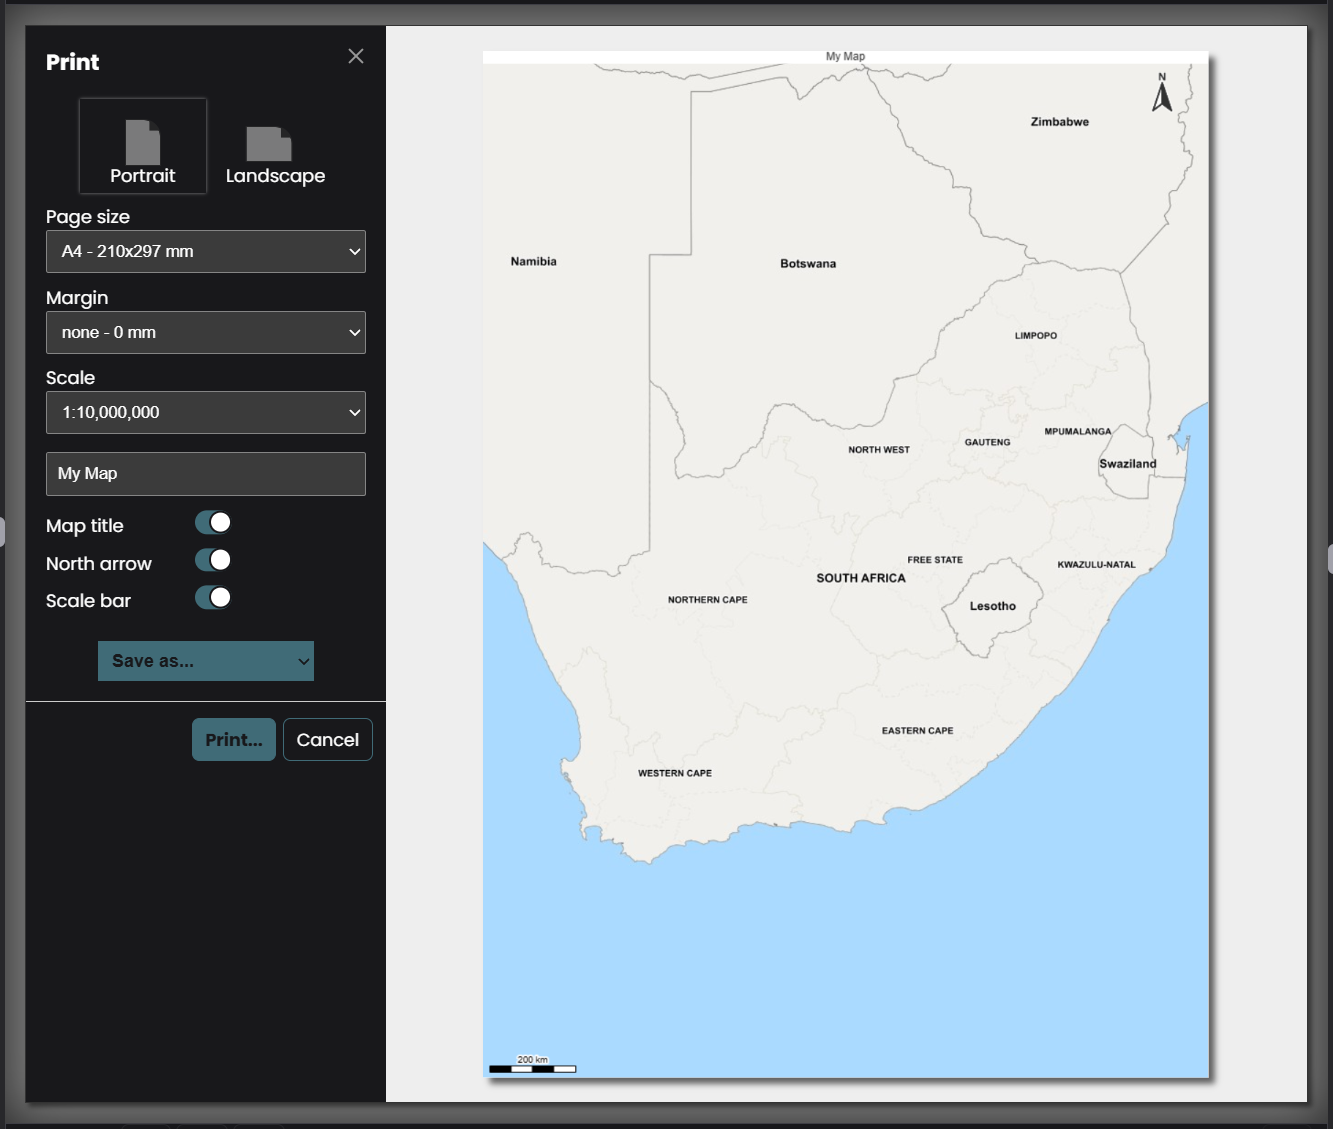
The Map Printing dialog allows you to create a printable version of the current map view. You can configure the page size, orientation, title, and legend.
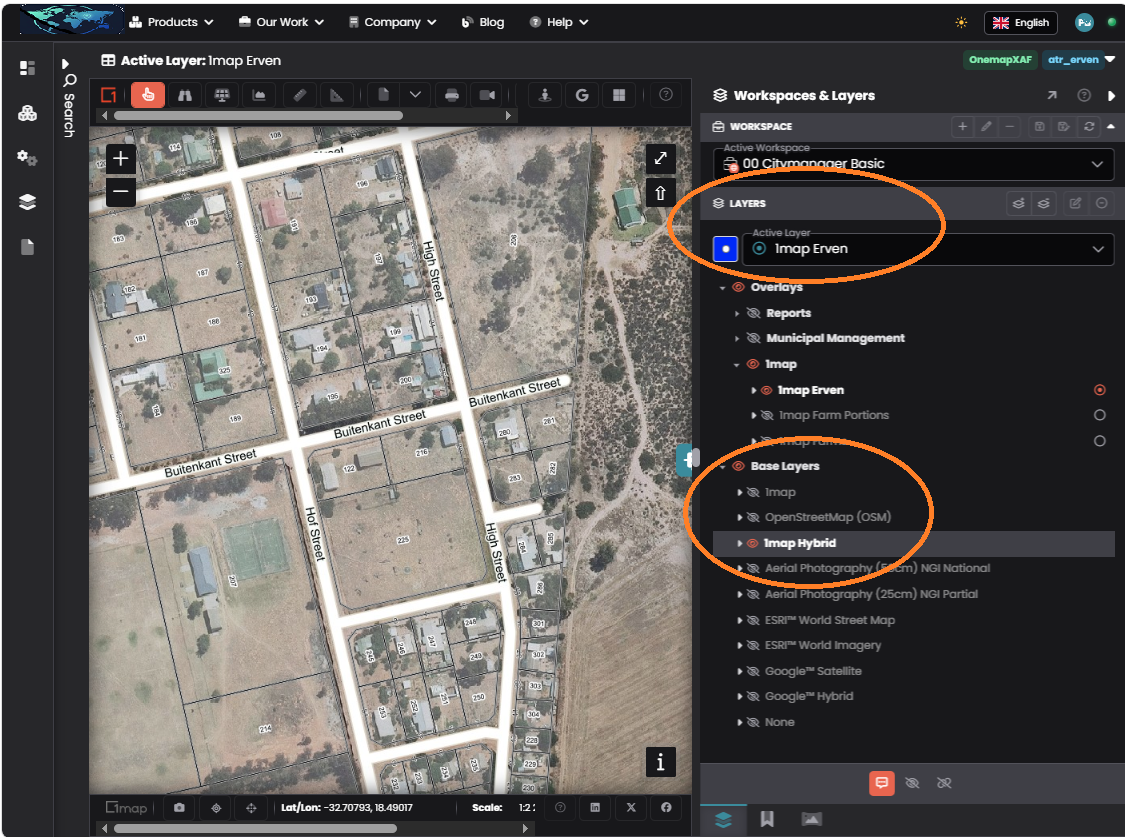
Choosing Map Printing
Click on the Map Printing icon and set up the contents of the page you wish to print, or copy to clipboard, or save as a .pdf, .jpg or .png.
Map Page content
You can set up the following:
- Map Page content — the map displayed in the print window can be dynamically moved, navigated and adjusted until it shows exactly the area you wish to print, in the same way as you would navigate on the map panel itself.
- Map layer content — add overlays or base layers you wish to display on your map by opening the East panel (Workspaces & Layers) and making them visible.

- Orientation - choose Portrait or Landscape
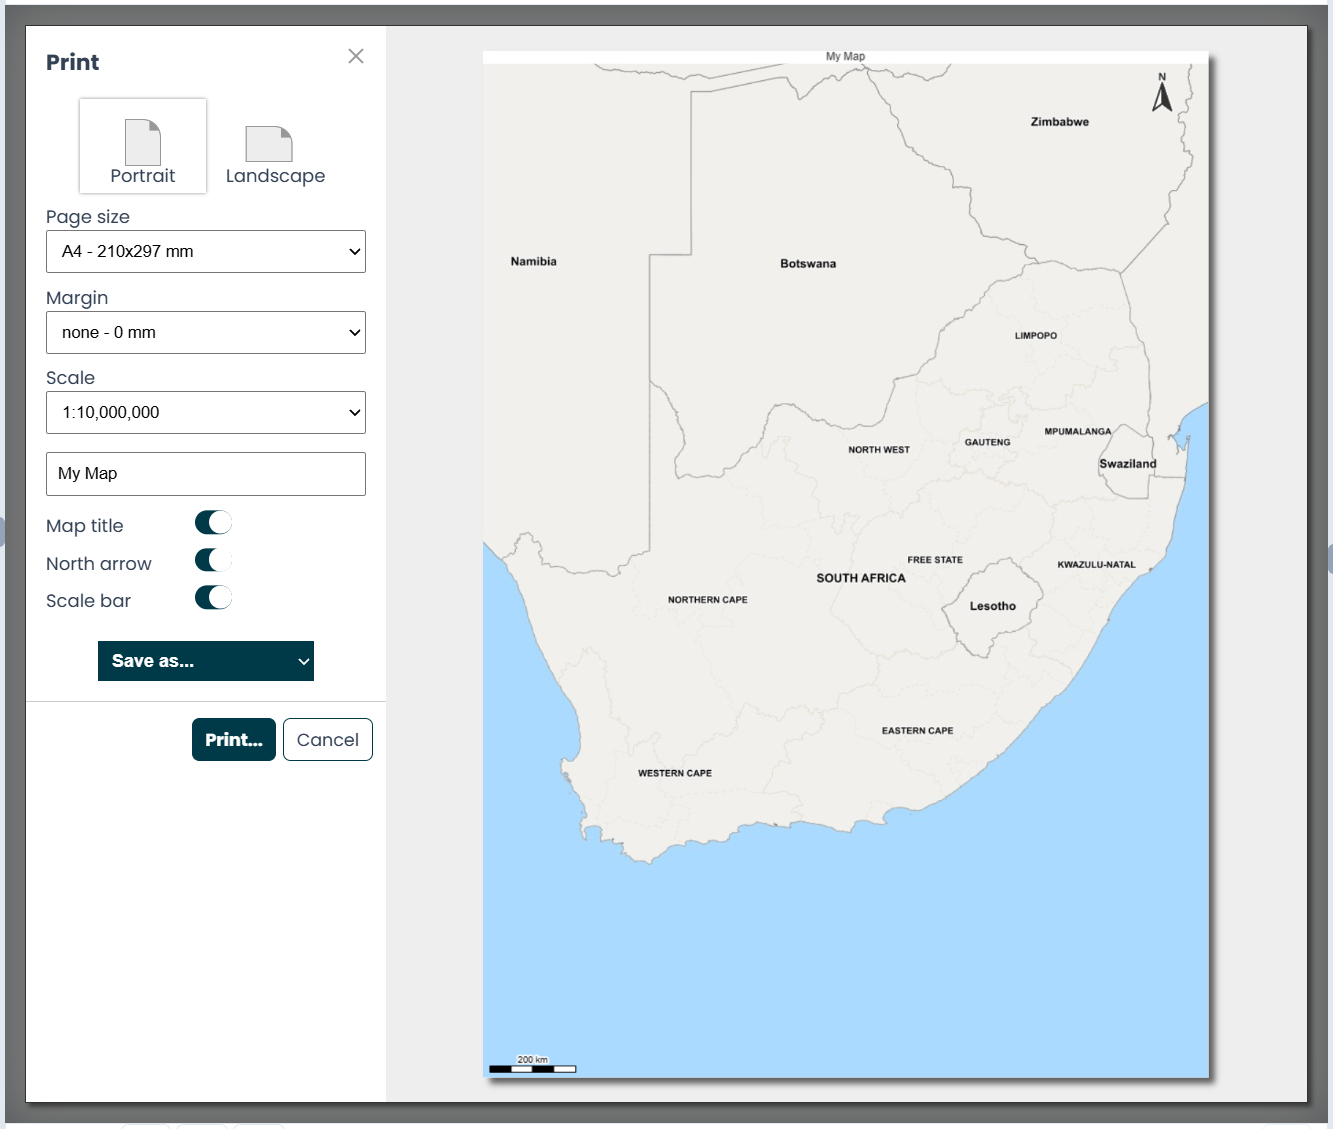
- Page Size — click the dropdown arrow and choose from the available sizes, e.g. A3 or US Letter.
- Margin — choose the white margin around the printed map (e.g. none, or a few millimetres).
- Scale — click the dropdown arrow and choose the scale you wish to use; the options are set up appropriately for your organisation or geographical location.
- North Arrow — display or hide the North arrow on the print (top-right corner).
- Scale bar — display or hide the scale bar (bottom-left corner of the print).
- Map Title — switch off if you do not want a title to appear at the top, or slide to the right and add your wording in the "My Map" field.
- Save As — click the dropdown box and choose the output you want: copy to clipboard, or save as a
.pdf,.jpg, or.pngfile. - Print — click Print to open your browser's print dialog, from which you can print to your printer.