
Appearance
Map Tools
The row of buttons above the map is where the tools live: measuring, magnifying, printing, recording, getting data in and out. This page covers the tools that come with the product.
The toolbar
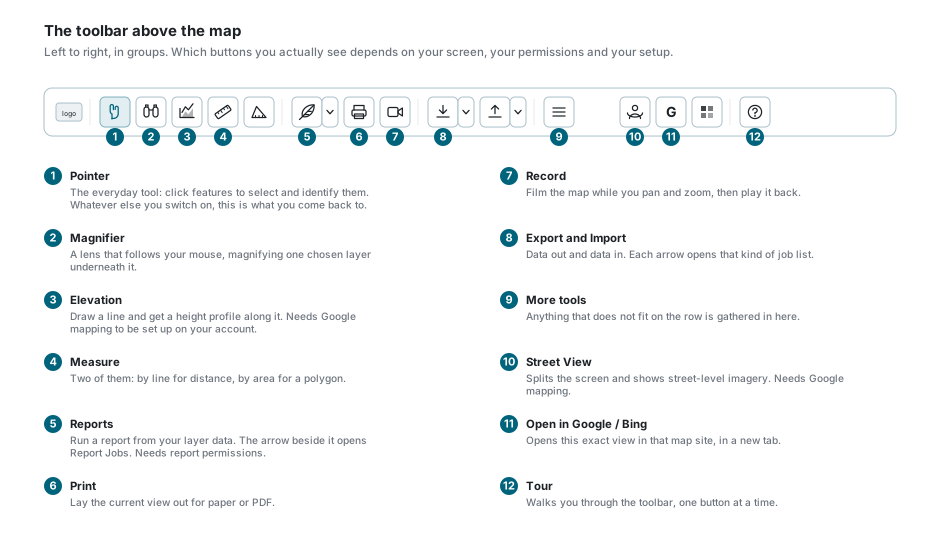
| Tool | What it is for |
|---|---|
| Pointer | The everyday tool: click features to select and identify them. See Feature Selection. |
| Magnifier | A lens that follows your mouse, magnifying one chosen layer. |
| Elevation | Draw a line and get a height profile along it. |
| Measure by line | Distance along a line you draw. |
| Measure by area | The area of a shape you draw. |
| Reports | Run a report from your layer data. See Reports. |
| Lay the current view out for paper or PDF. See Printing Maps. | |
| Record | Film the map while you pan and zoom, then play it back. |
| Export | Data out, as GIS or spreadsheet files. See Export Layers. |
| Import | Data in, as a new or existing layer. See Import Layers. |
| Street View | Splits the screen and shows street-level imagery. |
| Open in Google / Open in Bing | Opens this exact view in that map site, in a new tab. |
| Tour | Walks you through the toolbar, one button at a time. |
Your toolbar may be shorter than this
Not every button is there for everybody, and that is normal:
- Elevation, Street View and Open in Google only appear when Google mapping has been set up for your account. Without it they are simply not on the row.
- Reports needs report permissions.
- Most tools need a reasonably wide window, and on a phone the toolbar is not shown at all.
- Your organisation's own modules can add their own buttons to this same row. Those are documented in their own pages, not here.
One tool at a time
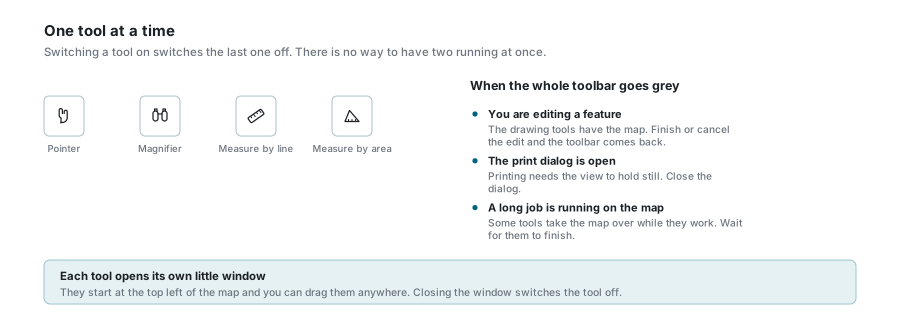
Only one of these tools runs at a time. Press another and the first switches itself off; close whatever you are using and Pointer comes back on its own.
Each tool opens its own small window at the top left of the map. Drag it wherever suits you. Closing the window switches the tool off.
The whole toolbar goes grey while you are editing a feature, while the print dialog is open, or while a long job has taken the map over. Finish or close whatever that is and it comes back.
Measuring
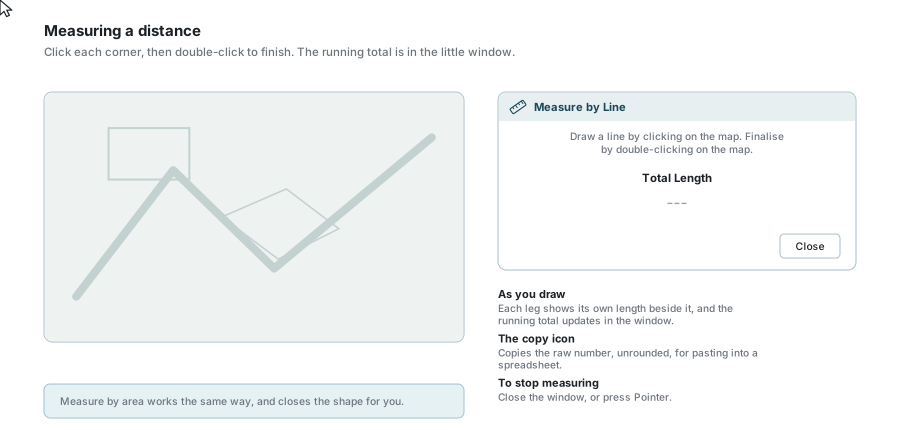
Both measuring tools work the same way:
- Press Measure by line or Measure by area.
- Click each corner on the map. Each leg shows its own length as you go.
- Double-click to finish. The total appears in the window.
The area tool closes the shape for you, so you do not have to click back onto your starting point.
To stop measuring, close the window or press Pointer.
The copy icon
Beside every number is a small copy icon. It copies the raw number, unrounded, which is what you want when the measurement is going into a spreadsheet. Selecting and copying the text does the same thing.
What the numbers come back in
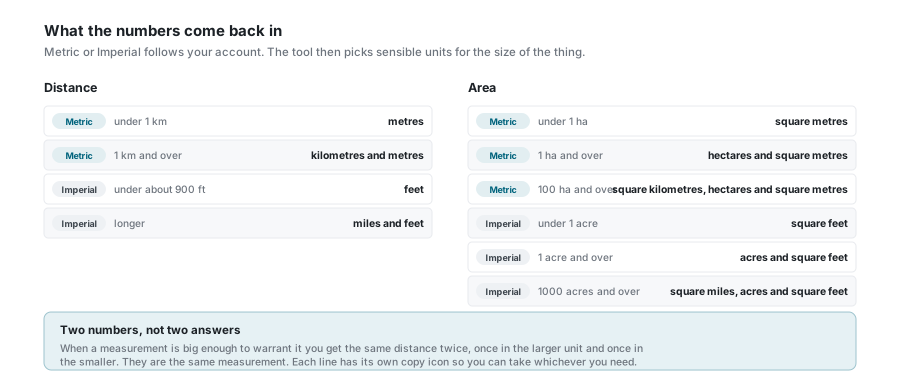
Whether you get metric or imperial follows your account setting, shown as Units in the strip under the map. Within that, the tool picks units to suit the size:
| Small | Medium | Large | |
|---|---|---|---|
| Distance, metric | metres | kilometres and metres | |
| Distance, imperial | feet | miles and feet | |
| Area, metric | square metres | hectares and square metres | square kilometres, hectares and square metres |
| Area, imperial | square feet | acres and square feet | square miles, acres and square feet |
When you see two or three numbers, they are the same measurement written different ways, not separate answers.
The magnifier
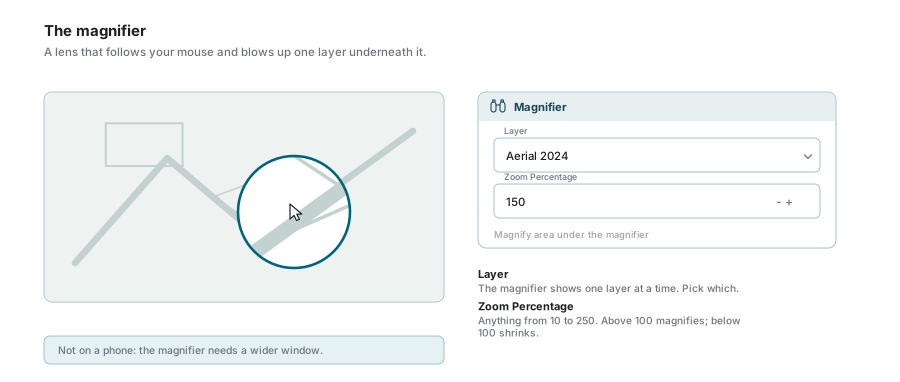
The magnifier puts a round lens under your mouse and blows up one layer inside it. Its window has two settings:
| Setting | What it does |
|---|---|
| Layer | Which layer the lens magnifies. One at a time. |
| Zoom Percentage | Anything from 10 to 250. Above 100 magnifies; below 100 shrinks. |
It is most useful on aerial photography, where you want a close look at one spot without losing the wider view.
The magnifier needs a wide enough window, so it is not available on a phone.
The elevation profile
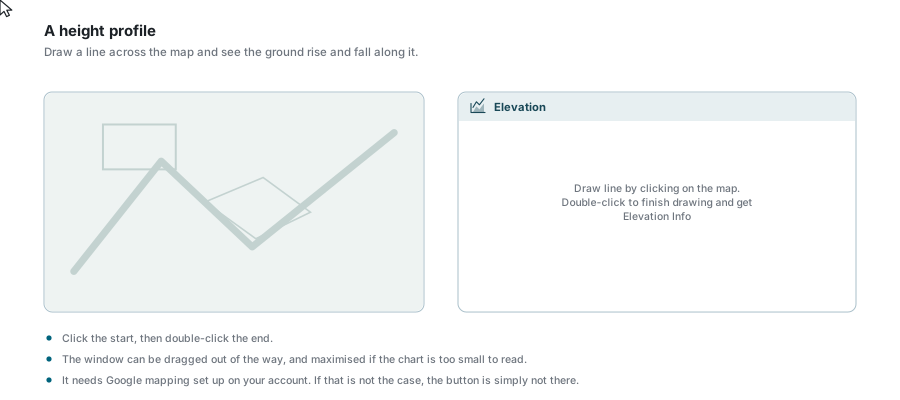
Press Elevation, click the start of your line, then double-click at the end. The window fills with a chart of the ground height along that line, distance across the bottom.
The window can be dragged out of the way, and maximised when the chart is too small to read.
No Elevation button?
The elevation profile gets its heights from Google. If Google mapping is not set up on your account the button is simply not on the toolbar. The same applies to Street View and Open in Google.
Recording the map
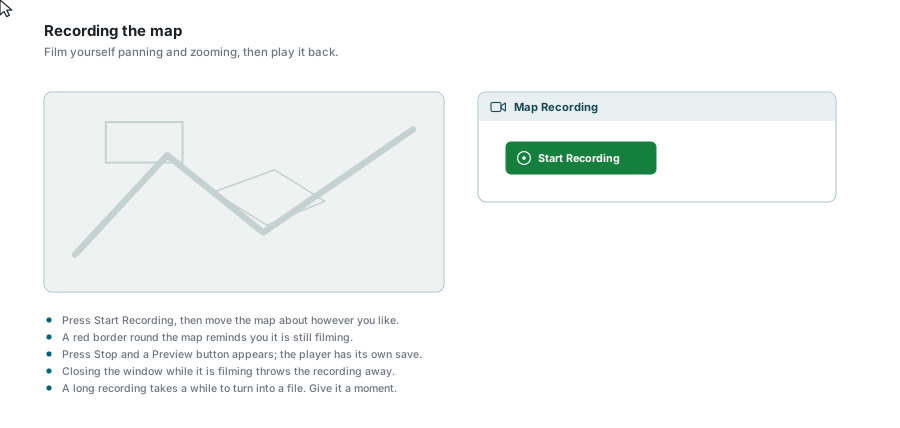
Record films the map while you use it, which is the easiest way to show somebody a route or a change.
- Press Record to open the window, then Start Recording.
- Pan, zoom, switch layers, whatever you want captured. A red border round the map reminds you it is still filming.
- Press Stop Recording.
- A Preview button appears. It opens a player, and the player's own controls save the file.
Two ways to lose a recording
Closing the window while it is still filming throws the recording away. And a long recording takes a while to turn into a playable file after you press Stop, so give it a moment before deciding something went wrong.
Street View
Street View splits the screen: the map on one side, street-level imagery on the other. Click anywhere on the map to move the camera there.
The panel has its own buttons to make it full width or close it again. Closing the panel switches the tool off.
Open in Google, open in Bing
These two do not change anything on your map. They take the centre and zoom of your current view and open the same place in Google Maps or Bing Maps in a new browser tab, which is handy for a quick second opinion on aerial imagery or a street name.
When the window is too narrow
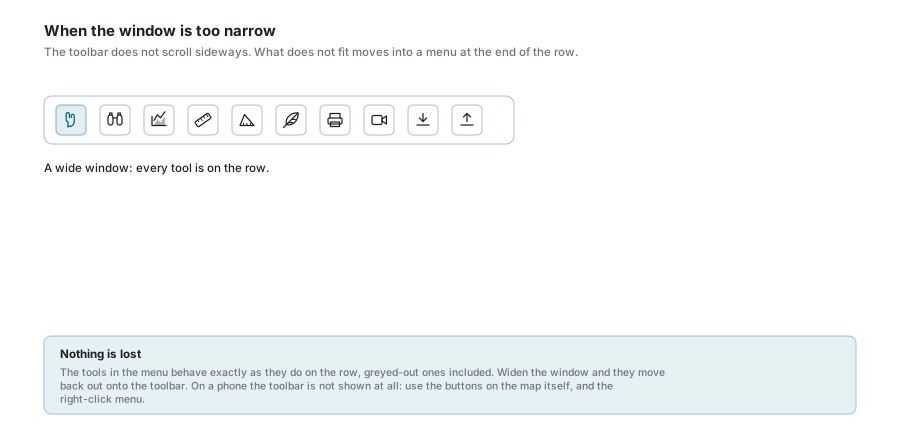
The toolbar does not scroll sideways. When there is not enough room, the buttons that do not fit are gathered under a More tools button at the end of the row. Open it and they are all there, behaving exactly as they do on the toolbar, greyed-out ones included. Widen the window and they move back out.
On a phone the toolbar is not shown at all. Use the buttons on the map itself and the right-click menu instead - see Map Navigation.
The strip under the map
The bottom strip carries the snapshot button, your location, zoom to coordinates, the GIS calculator, and the Lat/Lon, Scale and Units readouts. It is covered in Map Navigation.
If something looks wrong
| What you see | What it means |
|---|---|
| A tool you were told about is not on the toolbar | It needs something your account does not have: Google mapping, a permission, or a wider window. |
| The whole toolbar is greyed out | You are editing, the print dialog is open, or a job has the map. Finish or close it. |
| A tool switched itself off | You pressed another one. Only one runs at a time. |
The measurement window says --- | Nothing has been drawn yet, or the last shape was cleared. |
| Measurements are in the wrong units | Units follow your account. The setting is shown in the strip under the map; ask your administrator to change it. |
| Two numbers in the measurement window | The same measurement in two units. Take whichever you need. |
| The magnifier shows nothing | The layer chosen in its window may be hidden, or out of its zoom range. |
| The elevation chart is empty | The line may be too short, or the height service did not answer. Draw it again. |
| The recording will not save | Wait: a long recording takes time to become a file. Do not close the window in the meantime. |
| Street View shows grey | There is no street-level imagery at that spot. Click somewhere on a road. |
See also
- Map Navigation - moving, zooming, and the strip under the map
- Feature Selection - what the Pointer does
- Printing Maps - the full print workflow
- Reports - running reports on layer data
- Export Layers and Import Layers